Developing with Local NuGet in Visual Studio in an Offline Environment
Introduction
In some scenarios, development environments may have restricted internet access. Consequently, when using packages, you may need to manually download the corresponding DLLs for reference. However, since some packages are released for multiple versions of the Framework, the DLLs you have might not be compatible with your current Framework. Additionally, some packages may depend on others, requiring you to reference all related DLLs to make them work.
Directly referencing DLLs makes it difficult to effectively manage packages via NuGet when handing the project over to other developers who use NuGet. Therefore, in such scenarios, it is still recommended to avoid referencing manually downloaded DLLs directly.
Furthermore, if you are taking over a project that uses NuGet to install packages and are developing in an offline environment, you may face issues related to package restoration.
NuGet Offline Package Configuration
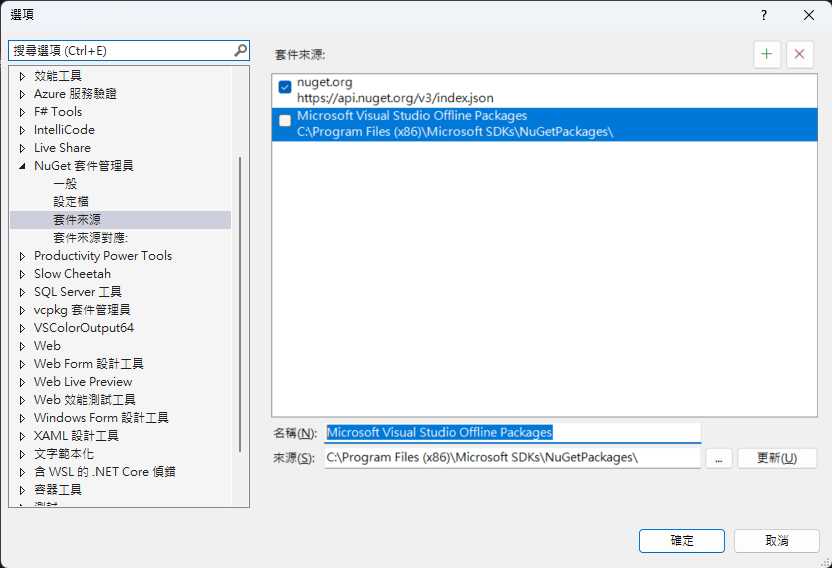
In the "Package Sources" settings of Visual Studio, you can see that there are already default settings for offline packages.
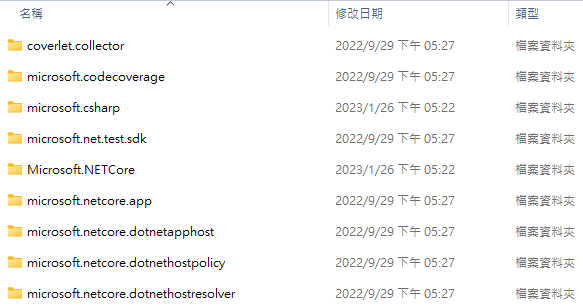
Under the configured folder, there are some packages by default.
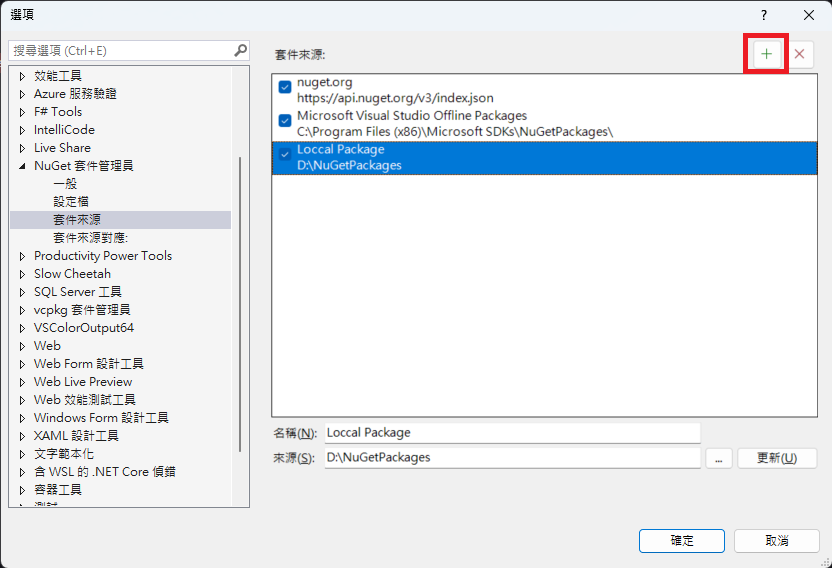
You can also click the "+" button in the top right corner to add your own sources.
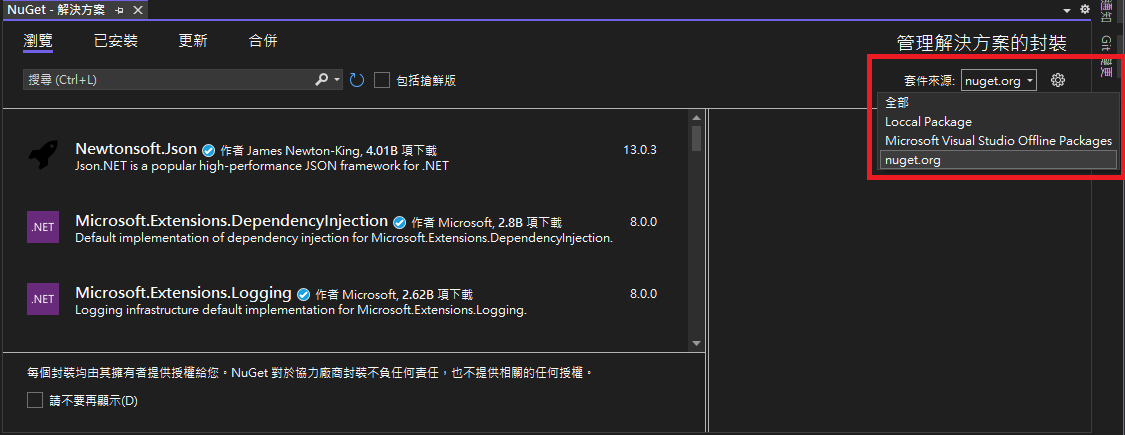
When installing packages using NuGet, you can select the package source in the top right corner.
Extending Local Packages
For information on how to publish a Class Library as a package, please refer to Publishing NuGet Packages with Default Files using Visual Studio; this will not be explained here.
There are two ways to publish local packages to a local folder:
- Download "nuget.exe" from NuGet Downloads.
- After installing the "NuGet.CommandLine" package, use the "Package Manager Console" to perform operations (this essentially uses "nuget.exe", which is downloaded along with the "NuGet.CommandLine" installation).
Next, use the nuget add {packagePath} -Source {sourcePath} command to publish the package to {sourcePath}. For specific command instructions, please refer to add command (NuGet CLI).
Extending Packages from NuGet
This method requires a computer that can connect to NuGet and has permission to transfer files to the development environment.
When installing a package from NuGet, the package containing NuGet data is downloaded locally. In a Windows environment, the path is "%userprofile%.nuget\packages". When subsequent projects need to install the same package, it will attempt to install from the local machine first. If the package does not exist locally or the specified version cannot be installed, it will then install from the configured package source.
Therefore, you only need to place the packages you want to use into the offline package source configured for the development environment. In other words, if you want to control the packages or versions available in the development environment, authorized personnel can install the packages first and then place them in each development environment for developers to use.
WARNING
When installing NuGet packages using .NET Framework, "package.config" is used by default. At this time, there will be a "packages" folder in the project root directory, which also contains installed packages. However, the packages here do not contain complete NuGet data, so do not copy them from here to the configured local package source.
Change Log
- 2023-12-05 Initial document creation.